This version is not PRO. Please note that. Soon, PRO will be coming. I just set up RustDesk pro with WebGui a couple of months ago.
Please listen carefully to the RustDesk warning again. Do not install RustDesk and connect to the phone agents (fake windows, fake apple, fake ATT, fake bank, fake IRS) server. They will trick you and take your personal information.
This solution is significantly less costly than TeamViewer and provides the most efficient solution for my job. It is also significantly less costly than TeamViewer. It allows me to resolve any issues on my employees or family’s computers, which reduces the cost of resolving the issue. Not only that, but it is highly secured. I chose to employ enforced encryption on RustDesk because I’d prefer not to expose it to the public and exploit my RustDesk server.
I have been using Grammarly for my work and to strengthen my writing skills. I was looking for something cheaper and more affordable, and I found this LanguageTool, which offers an API on Docker, and it works great. We won’t get premium, though… they’re not yet available for self-hosted premium.
Before we start, please make sure your NGINX Proxy Manager and Portainer are up and running. It is unnecessary to establish a network as it has already been integrated into Docker.
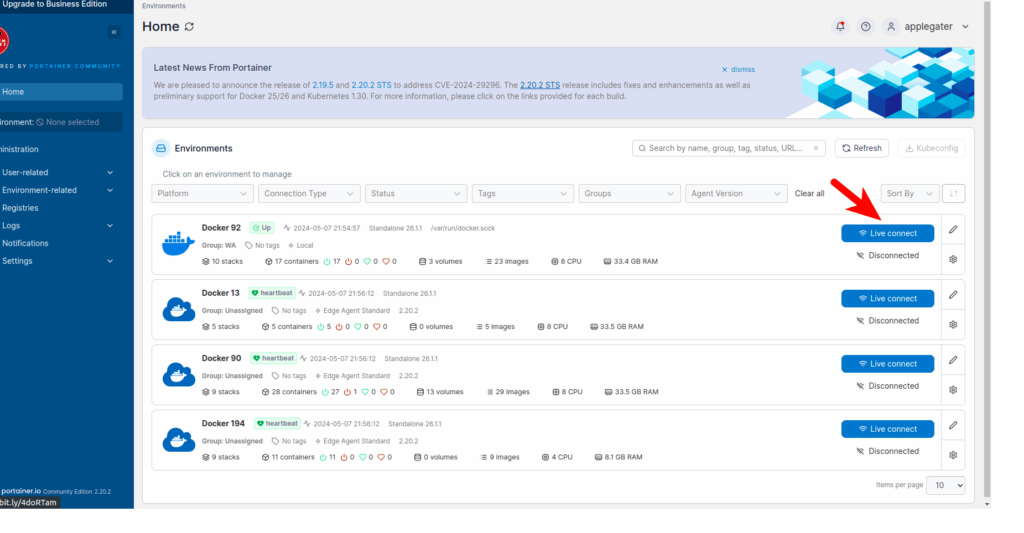
Go to Portainer sites→ Login admin→ stacks → add stacks:
version: "3"
services:
  languagetool:
    image: erikvl87/languagetool
    container_name: applegate-languagetool
    networks:
        - nginx
    environment:
        - langtool_languageModel=/ngrams  # OPTIONAL: Using ngrams data
        - Java_Xms=512m  # OPTIONAL: Setting a minimal Java heap size of 512 mib
        - Java_Xmx=1g  # OPTIONAL: Setting a maximum Java heap size of 1 Gib
    volumes:
        - /mnt/applegate5tb/language-tool/data:/ngrams
networks:
  nginx:
    external: true
Now deploy the stack and open the nginx proxy manager sites to add this secure HTTPS site. Let’s get started.
Scheme – HTTP Forward Hostname – your container_name Forward Port – 8010 (Default on docker for LanguageTool).Ensure enable SSL and HTTP/2 and HSTS
Your websites have been successfully launched. Go check it out and try the API out.
To connect to this API, please download language tools for Edge or Firefox or Chrome. Please note that Desktop PCs do not yet have API support. Stay tuned on this.
My goal to make my Nextcloud to become Google Workspace because my goal is our data most important to privacy with our data sensitive. And I would like to purchase free instead of paid Google Workspace because we have our server, and we use it for IT documents and resources.
So, you need to make sure nginx proxy manger and Portainer Up running before we start this.
We do not need to create a network because we already did created with nginx proxy manager (nginx)
If you’re self-hosting Nextcloud using Docker, integrating Redis as a caching and file locking service is a must for better speed and reliability. Portainer makes managing Docker super easy, especially with its user-friendly “Stacks” feature. In this post, you’ll learn step by step how to:
Deploy Redis using Portainer Stacks
Connect the Redis container to the network used by your Nextcloud instance (for simple, secure communication)
Update your Nextcloud config to use Redis
Let’s get started!
Prerequisites
Docker & Docker Compose installed and running
Portainer up and accessible (http://your-server:9000)
A Nextcloud stack/container already running on Docker
Portainer has permissions to manage your Docker host
Step 1: Identify (or Create) the Nextcloud Docker Network
First, Nextcloud and Redis need to be on the same Docker network so they can talk.
Find the Network Name
If you deployed Nextcloud as a Portainer stack, you likely have a custom network. To check:
In Portainer, go to Containers and find your Nextcloud container.
Click on it and look for the Network section.
The network name may look like nextcloud_default (if your stack is named ‘nextcloud’). Take note of it!
If not found, you can always create a network manually:
docker network create nextcloud-net
Step 2: Create a Redis Stack in Portainer
In Portainer, go to Stacks > Add Stack
Name your stack, e.g., redis
Use the following example docker-compose file:
version: '3.7'

services:
  redis:
    image: redis:alpine
    container_name: redis
    restart: unless-stopped
    networks:
      - nextcloud_network
    # For persistent storage (optional):
    # volumes:
    #   - redis-data:/data

# Define external network (replace with your actual network name)
networks:
  nextcloud_network:
    external: true

# Uncomment for persistent volume (optional)
# volumes:
#   redis-data:
Important: Change nextcloud_network to your Nextcloud network name (from Step 1), e.g., nextcloud_default.
Click Deploy the stack
Step 3: Confirm Redis is Running & Networked
In Containers, check that the redis container is running and attached to the correct network. You should see both nextcloud and redis containers under the same network.
Step 4: Add Redis Configuration to Nextcloud
SSH into your Nextcloud server or use Portainer’s console and add the following to your config/config.php for Nextcloud (usually found in the nextcloud/config/ directory):
'memcache.local' => '\\OC\\Memcache\\APCu',
'memcache.locking' => '\\OC\\Memcache\\Redis',
'redis' => [
   'host' => 'redis',       // the service name from your stack
   'port' => 6379,
   // 'password' => 'yourpassword', // If you set one
   'timeout' => 0.0,
],
If you gave your redis container a different name, adjust 'host' => 'redis' accordingly.
If you set a redis password (not done in this example, but recommended for production!), include the 'password' line.
Step 5: Restart Nextcloud Container
You can do this in Portainer via the container menu (Actions > Restart), or with:
docker restart <nextcloud-container-name>
Troubleshooting
If Nextcloud can’t connect to Redis, double-check:
Both containers are on the same Docker network
host matches the Redis container’s service/container name (not localhost or 127.0.0.1)
No firewall is blocking Docker internal traffic
Use Portainer’s logs for debugging (redis and nextcloud containers)
Conclusion
With just a few edits and a quick stack deployment in Portainer, you can power up your Nextcloud setup with Redis for better performance, safer file locking, and future-proof scaling. Let Portainer do the heavy lifting—no need to wrangle the command line!
Have questions or run into issues? Drop them below or check the Nextcloud docs for more tips.
Happy self-hosting!
Please let me know if you’d like examples for persistent volumes, securing Redis, or extra performance tuning!
VaultWarden is a lightweight, open-source Bitwarden server. Deploying it on Docker with Portainer and securing it via Nginx Proxy Manager ensures easy access, security, and maintenance for your password manager. While MariaDB isn’t officially supported instead of SQLite, experienced users can try it. This guide explains the full Docker setup.
Prerequisites
Docker & Portainer installed and running.
Nginx Proxy Manager installed (as a Docker container).
A domain or subdomain (e.g., vault.yourdomain.com) pointed to your server’s IP.
Open TCP ports 80, 443 on your server.
Again: For stables, production setups, use SQLite/Postgres/MySQL 8.
Step 1: Create VaultWarden + MariaDB Stack in Portainer
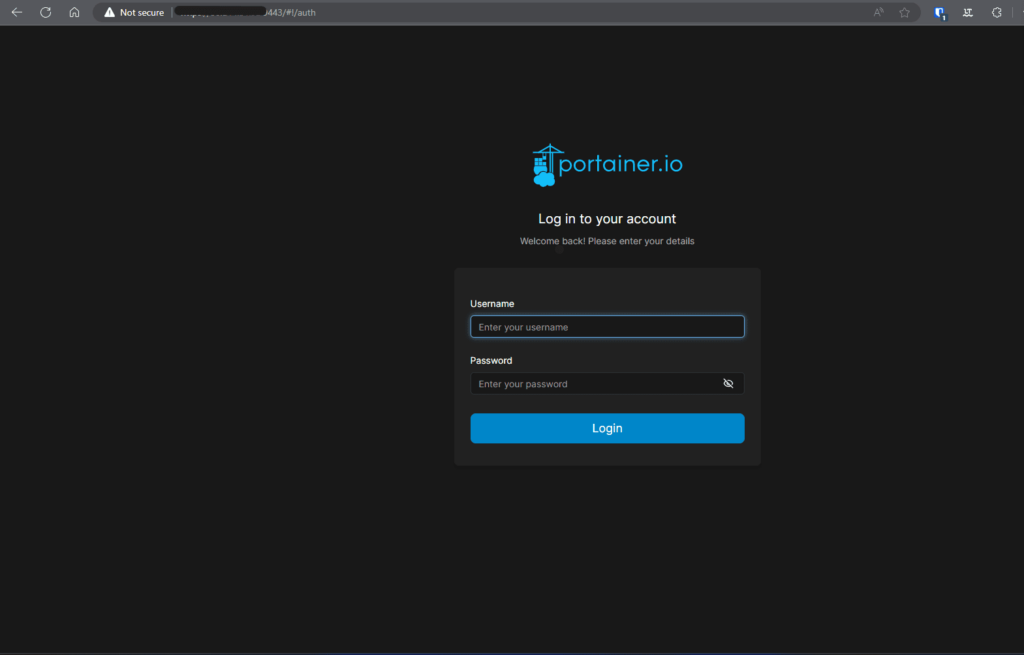
1.1 Access Portainer
Visit http://YOUR.SERVER.IP:9000 and log in.
1.2 Add a New Stack
Go to Stacks > + Add stack.
Name it, e.g., vaultwarden-mariadb.
1.3 Paste in the Stack YAML (docker-compose format)
Change passwords and ADMIN_TOKEN to secure values.
By default, no port is mapped; Nginx Proxy Manager will forward traffic via Docker networking.
1.4 Deploy the Stack
Click “Deploy the stack” and wait for containers to start.
Step 2: Connect Nginx Proxy Manager to the Docker Network (if needed)
To allow NPM to forward by container name, attach NPM to the same Docker network. Assume your NPM container is named nginx-app-1:
You can do this using Portainer UI (Containers > nginx-app-1 > Networks > Join network > select vw-net), or via CLI:
docker network connect vw-net nginx-app-1
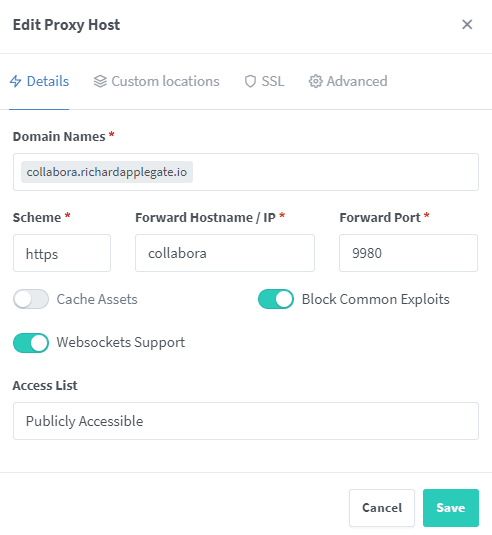
Step 3: Add a Proxy Host in Nginx Proxy Manager
Go to NPM UI: http://YOUR.SERVER.IP:81
Proxy Hosts > Add Proxy Host
Settings:
Domain Names:vault.yourdomain.com
Scheme:http
Forward Hostname/IP:vaultwarden
Forward Port:80
Block Common Exploits: Checked
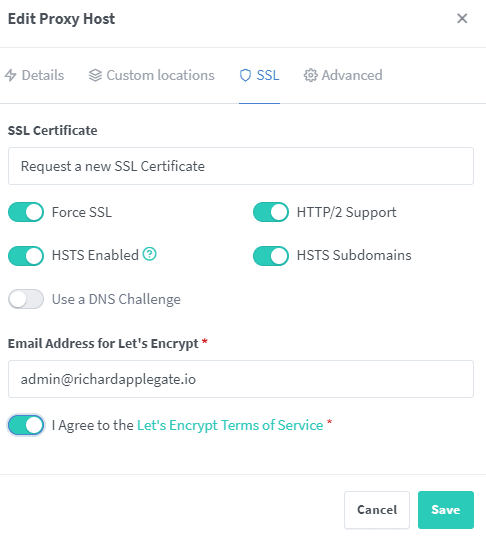
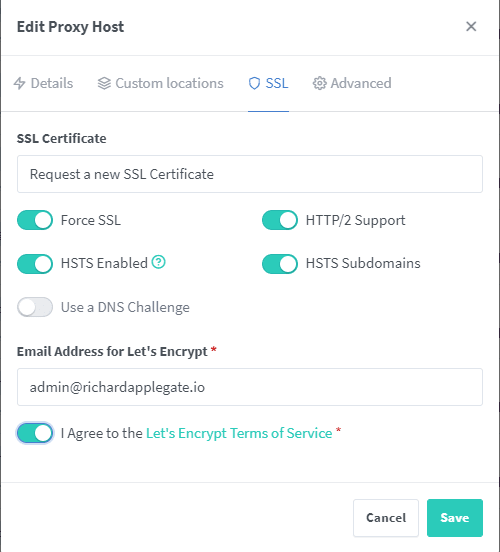
SSL Tab:
Enable SSL: Yes
Force SSL: Yes
Request a new SSL Certificate: Use your email and agree to TOS
Save
Step 4: Access Vaultwarden
In your browser, go to https://vault.yourdomain.com
You should see the VaultWarden login screen.
If you want to access the admin panel: https://vault.yourdomain.com/admin (use the ADMIN_TOKEN you set)
Troubleshooting
502 Gateway Error: Verify NPM is on the same network and forwarding to the right container name and port.
Database Errors: If you see “unsupported backend” or MariaDB-related errors, this is a sign MariaDB isn’t compatible. Try with MySQL 8 or switch to SQLite for production use.
SSL Issues: Make sure DNS is correct and ports 80/443 are open.
Security & Production Warnings
MariaDB is not supported by Vaultwarden, even if it appears to work at first. Use MySQL 8 or SQLite/PostgreSQL instead.
Back up your /data and database volumes regularly.
Always use a strong ADMIN_TOKEN.
Conclusion
You’ve now deployed Vaultwarden in Docker using Portainer, experimented with MariaDB as a backend, and secured your setup using Nginx Proxy Manager! For mission-critical password management, please consider using SQLite, MySQL 8, or PostgreSQL.
Happy Self-Hosting! Have questions? Drop them below.
Since we don’t have one in the active tutorial, we have to create Portainer on Docker Compose in SSH Terminal instead of Portainer WebGui, since we don’t have one.
1. I am not using Docker Volumes to save our data, so create the folder where you want to save because I am not using Docker Volumes for a reason.
5. Now that the Portainer is up and running, we can start to use it. To make my site secure and HTTPS with let’s encrypt, we need to create Let’s encrypt on Portainer. I already have and made an account. You should expect to see a first time creation of an account. https://yourIP:port
Now, you can log in to Portainer to start creating a docker nginx proxy manager.
Step 2 – setting up nginx proxy manager
1. After selecting the Server for your initial Portainer Docker, you will notice the option “Stacks” on the front page of Portainer. To add a stack, click the blue button.
2. You can choose any name you want, but it’s helpful for me to keep things organized. We made a program called nginx__. I use compose docker configure, but we have MariaDB Database separate docker compose because I want to use one database for all my General apps. If you desire to utilize the MariaDB database, the following tutorial provides guidance on setting up the database on Portainer.
I already created a MariaDB database and a user for the NGINX proxy manager. So easy with PhpMyAdmin method instead, terminal console. Learn more about set up PhpMyAdmin!
3. Launching the stack for nginx!
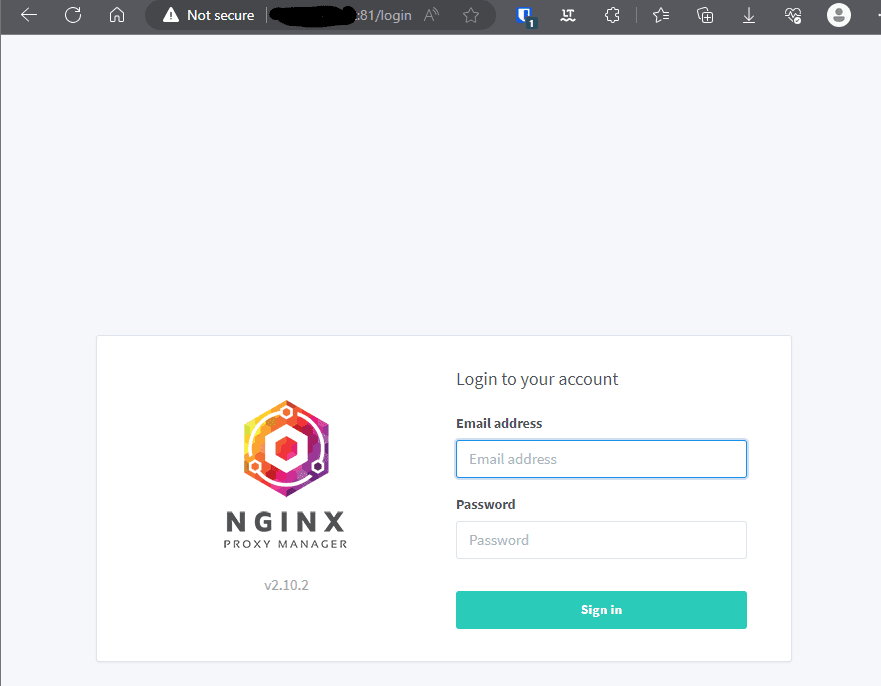
Now open the Docker Nginx Proxy Manager at http://yourIP:81.
There is a default login because there is no creation page for users.
Email: admin@example.com Password: changeme Immediately after logging in with this default user, you will be asked to modify your details and change your password.
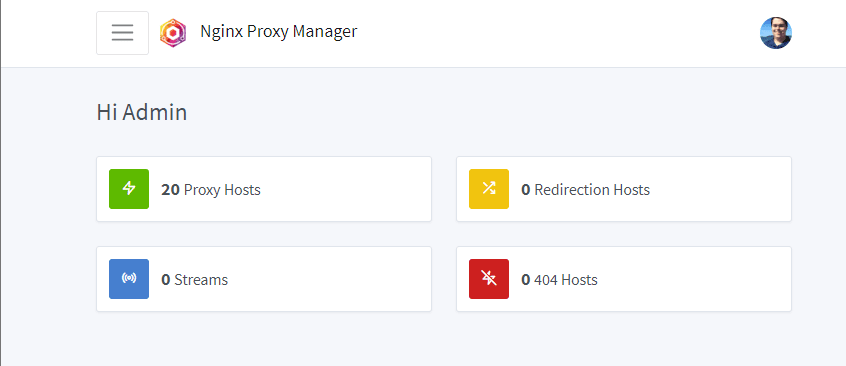
After you change the password and Username you set, then now you should see this:
You should be said “0 Proxy Hosts”. I just have many domains here to use all my apps.
Now you can open the Proxy hosts to make HTTPS certificates for NGINX proxy manager and Portainer.
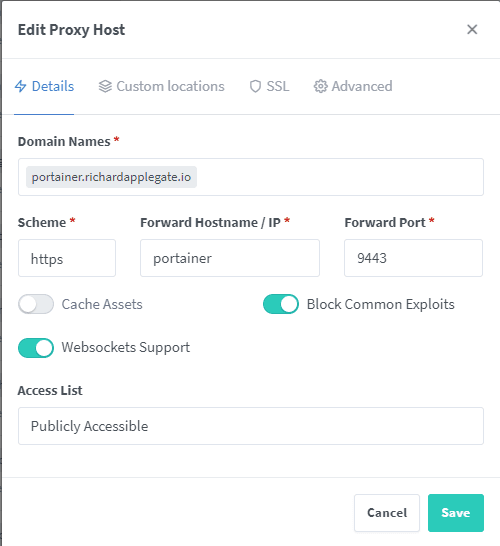
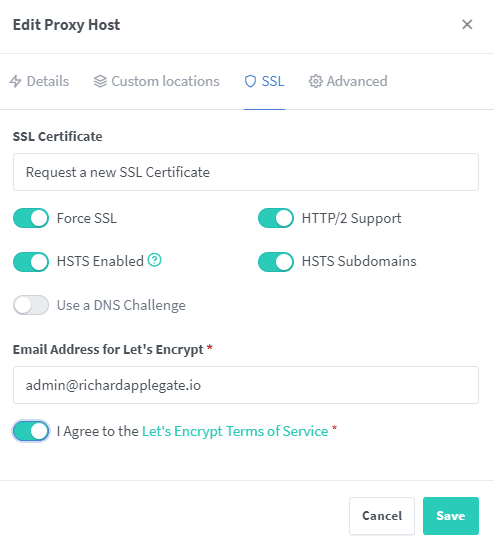
Nginx Proxy Manager – Nginx Proxy Host Detail
This for Nginx proxy Manager. That form you should fill out. Just a reminder, the Forward hostname/IP can work with docker-compose “container_name: nginx”.You see docker-compose.yml have container_name: that you create, and container_name needs to be on form where is Forward Hostname/IP. So that way this machine can communicate with container_name to more secure because never know IP changed.Last, for nginx proxy Manager – Force SSL and HTTP2 and HSTS need to be enabled.Now, our sites are secure, and you have to remove port 81 on docker-compose to secure our HTTP. We will never expose 80 or 81, but our nginx proxy manager needs port 80 for Let’s Encrypt. So, we leave port for 80 and 443 on our docker-compose.yml.
Portainer – Nginx Proxy Host Detail
Portainer – scheme for HTTPS and port for 9443 and make sure you enable block common exploits and Web sockets support. Portainer – you will need to enable SSL and HTTP/2 and HSTS.
Advanced custom nginx configurations won’t be needed anymore. Then now your Portainer and NGINX are secured!
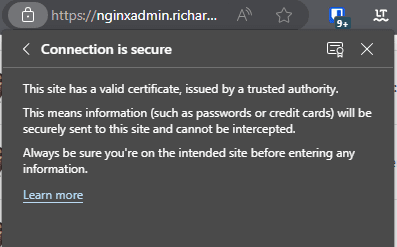
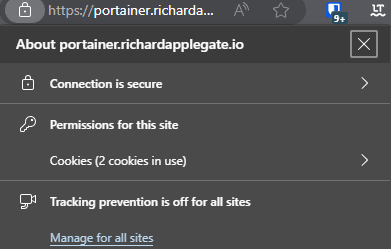
HTTPS on Portainer sites. 🙂
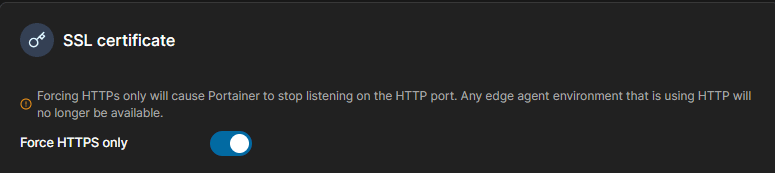
I recommend you all to force HTTPS only on private network too. It’s really safe. So, the Portainer itself app will not work with the HTTP port anymore.
Portainer ⇾ settings ⇾ scroll down until you see SSL Certificate
These are my beautiful cats who have been by my side throughout my entire life. They have always given me love and companionship, and I care for them deeply. Now, they have a new home—a safer and more comfortable place to live. Since my motorhome was not safe anymore, my cats have moved into our house, where they have both a garage and a cozy home to enjoy.
I woke up and see this so cute MaryMaryMiloMilo and All cats
On May 4th 2017, my back windows door was crack and break in by hammer.. so I went back YMCA where is employee is, and they want vaccum for me and tape for me while i replace windows.
May 10 2017 6 days later, after replacing windows, windows are worth $15 from pick n pull junk yard, and I did replace it by myself.