Tag: Final

  • Arista Edge Firewall 7.0.0-7.1.1 Upgrade: Fix Realtek Kernel Panic

    If you are upgrading from Arista Edge Firewall 7.0.0 to 7.1.1 and your system uses Realtek Ethernet devices, you may encounter a critical issue: Linux Ethernet drivers trigger kernel panics when Energy-Efficient Ethernet (EEE) is enabled. This guide walks you through every step to apply the official Arista patch and complete a clean installation to resolve the problem permanently.

    Why This Happens

    Energy-Efficient Ethernet (EEE) is a power-saving feature built into many network adapters. Unfortunately, certain Realtek Ethernet drivers in Linux — as used by the Arista Edge Firewall — are incompatible with EEE, causing the system to crash with a kernel panic during or after the upgrade. The fix is to disable EEE toggling before installation using an official patch provided by Arista.

    Step 1: Download the Required Patch Files

    Visit the official Arista wiki page and download the two patch scripts needed to disable EEE on Realtek devices:

    Arista Wiki: Patch – Disable EEE Toggle

    The two files you will need are:

    • eee-ignore-realtek-patch.sh
    • late_command.sh

    Step 2: Create a Bootable USB Drive

    Use Rufus (or a similar tool) to burn the Arista Edge Firewall 7.1.1 ISO to a USB drive and make it bootable. Once the USB drive is ready, open it in File Explorer and navigate to the simple-CDD folder.

    Navigating to the simple-CDD folder on the bootable USB drive

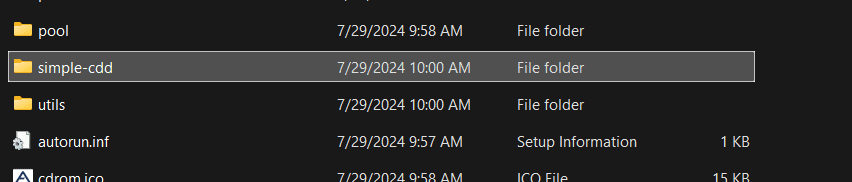
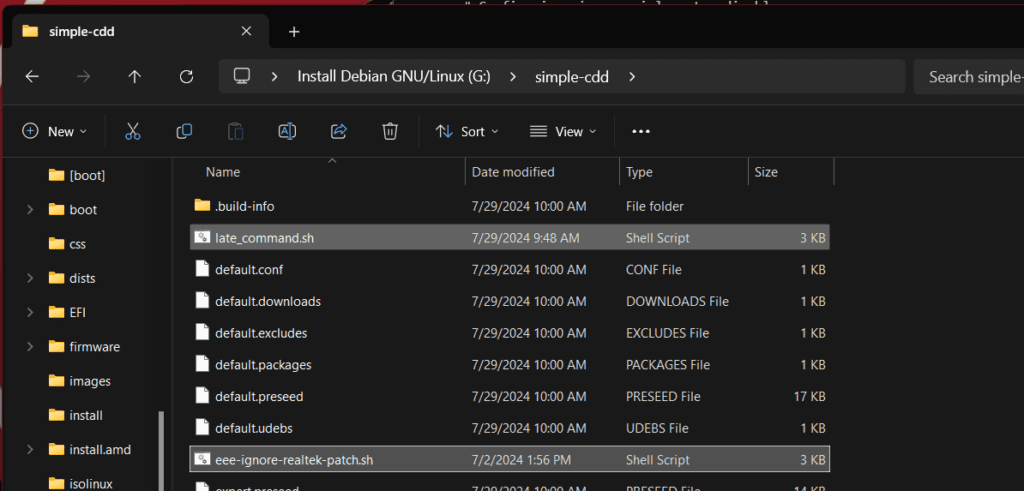
    Step 3: Copy and Extract the Patch Files

    Paste the two downloaded patch files — eee-ignore-realtek-patch.sh and late_command.sh — directly into the simple-CDD folder on the USB drive. If they are compressed, extract them first so the scripts are available as plain .sh files in that directory before proceeding.

    Patch files copied into the simple-CDD folder on the USB drive

    Step 4: Boot and Perform a Fresh Installation

    Plug the prepared USB drive into your firewall appliance and boot from it to begin a fresh installation of Arista Edge Firewall 7.1.1. The patch scripts will automatically disable EEE toggling for Realtek Ethernet devices during the installation process, preventing the kernel panic from occurring.

    Important: Keep EEE Disabled Going Forward

    Once the installation is complete, do not re-enable Energy-Efficient Ethernet on your Realtek network interfaces. Doing so will cause the system to crash again. To verify that EEE remains disabled after installation, run the following command in the firewall’s Linux shell, replacing eth0 with your actual interface name:

    ethtool --show-eee eth0

    Confirm that the output shows EEE as disabled. If it is not, consult the official Arista wiki page for additional remediation steps.

    Summary

    Upgrading to Arista Edge Firewall 7.1.1 on systems with Realtek Ethernet devices requires one small but critical preparation step: patching the installer to disable Energy-Efficient Ethernet. By downloading the official Arista patch scripts, placing them in the simple-CDD folder on your bootable USB, and performing a fresh install, you can complete the upgrade successfully without kernel panics. If you run into any issues, consult the official Arista wiki page for the latest guidance.

  • Cabinet Network Installation: Old Town Step-by-Step Guide

    I recently completed a cabinet network installation in Old Town, and I’m thrilled with how it turned out. Below is a full walkthrough of the process — from garage pre-assembly all the way through to the finished, level, on-site installation.

    Step 1: Pre-Assembling the Cabinet Network in the Garage

    Before heading to the job site, I pre-assembled the entire cabinet network at home in my garage. Working off-site is a smart strategy for projects like this — it lets you work at a comfortable pace, catch any fitment issues early, and dramatically speeds up the on-site portion of the installation.

    Cabinet network pre-assembly laid out in the garage before installation
    Close-up detail of cabinet network components during garage pre-assembly

    Step 2: Drilling Anchor Holes and Mounting On-Site

    Once on-site in Old Town, I drilled four anchor holes to seat the screw anchor clamps. Proper anchor clamps are critical for a safe, long-lasting cabinet network installation — they ensure the full weight of the unit is securely supported against the wall. Skipping or rushing this step is one of the most common causes of installation failure.

    Cabinet network being mounted on-site in Old Town
    Screw anchor clamp detail securing the cabinet network to the wall

    Step 3: Leveling the Cabinet Network

    With the cabinet network anchored, I took extra time to ensure everything was perfectly level. A level installation is not just about appearance — it is essential for the structural integrity and long-term functionality of the unit. Taking your time at this stage pays off significantly in the finished result.

    Using a level to ensure the cabinet network is perfectly horizontal during installation

    Finished Result: Cabinet Network Installation Video Walkthrough

    Watch the short video below to see the completed cabinet network installation in Old Town. The pre-build strategy saved significant time on-site, and the final result is clean, secure, and level — exactly what I was aiming for.

    Planning a Similar Cabinet Network Installation?

    If you are planning a cabinet network installation of your own, I am happy to help. Feel free to reach out with your questions — I can share tips and lessons learned from this project and others like it.

  • Connect MiFi Hotspot to Router: Tablet Tethering Guide

    If you’ve ever been unable to use a standard government or corporate network for your business, you’re not alone. We faced the same challenge and needed a reliable hotspot solution that could serve an entire office — not just a single device. After some experimenting, I found a straightforward way to connect a MiFi hotspot to a router using an Android tablet, and it works beautifully.

    What You’ll Need

    Before getting started, make sure you have the following items on hand:

    • An Android tablet with USB tethering support
    • A USB-C hub with an Ethernet port
    • A standard Wi-Fi router with a WAN port
    • A MiFi mobile hotspot device
    • An Ethernet cable

    How the Connection Chain Works

    The setup follows a simple three-step chain: the MiFi hotspot connects to the tablet via Wi-Fi, the tablet shares its internet connection through USB or Ethernet tethering, and the router then distributes that connection to every device on your network.

    Step-by-Step Setup

    1. Connect the tablet to the MiFi hotspot via Wi-Fi as you normally would.
    2. Plug a USB-C hub (with an Ethernet port) into your tablet.
    3. Run an Ethernet cable from the USB-C hub to the WAN port on your router.
    4. On the tablet, navigate to Settings > Network > Hotspot & Tethering and enable USB/Ethernet Tethering.
    5. Your router will now receive internet through the tablet, and every device connected to the router will have internet access.

    The best part? Your MiFi hotspot only sees one connected device — the tablet — while your router handles distributing the connection to everyone on the network. This is an excellent workaround if your MiFi device enforces a connection limit.

    Android tablet connected to a MiFi hotspot via Wi-Fi, with a USB-C hub and Ethernet cable running to a router WAN port
    The full connection chain: MiFi hotspot → tablet (Wi-Fi) → USB-C hub → Ethernet → router WAN port.

    Keeping the Tether Alive: Prevent the Tablet from Sleeping

    One common issue is that an idle tablet will eventually suspend the tether connection and drop your internet. Fortunately, Android’s Developer Options include a simple fix.

    1. Go to Settings > About Tablet and tap Build Number seven times to unlock Developer Mode.
    2. Navigate to Settings > Developer Options and enable Stay Awake (keeps the screen on while the device is charging).
    3. Reduce screen brightness to its lowest setting to conserve battery.
    4. Keep the tablet plugged into a power source at all times so it does not drain the battery.

    With these settings in place, the tablet will stay awake and maintain the tether connection indefinitely — keeping your router and your entire network online without interruption.

    Why This Works Better Than a Wi-Fi Extender

    You might wonder why not simply use a Wi-Fi extender or repeater. In practice, that approach proved unreliable with our MiFi device. Using a tablet as a tethering bridge delivers a stable, wired connection directly to the router’s WAN port — far more consistent than a wireless repeater setup, especially in a business environment where uptime is critical.

    If you’re looking for a budget-friendly way to share a MiFi hotspot connection across an entire network, this tablet tethering method is a clever and effective solution. Give it a try and share how it works for you in the comments below!

  • CrowdStrike Blue Screen Outage: Recovery & Prevention

    📰 Reference: CBS News: Microsoft CrowdStrike Outage — Blue Screen of Death Fix


    What Happened on July 19th, 2024

    On July 19th, 2024, a faulty software update tied to the CrowdStrike and Microsoft outage triggered the infamous Blue Screen of Death (BSOD) on Windows computers across the globe — and businesses of all sizes felt the impact. If your system was set to auto-update, there is a good chance you woke up to a nightmare scenario: screens frozen, systems unresponsive, and operations at a complete standstill.

    How to Fix the CrowdStrike BSOD

    The good news? A fix exists. The recommended solution is to boot your affected Windows machine into Safe Mode and remove the problematic CrowdStrike driver — specifically, the csagent.sys file located in the CrowdStrike directory. Both Microsoft and CrowdStrike have released official step-by-step guidance walking users through this recovery process. You can find full details via the CBS News article linked above.

    ⚠️ Quick Fix Summary: Boot into Safe Mode → Navigate to the CrowdStrike directory → Delete or rename csagent.sys → Reboot normally.

    Why This Hit Businesses So Hard

    What made this outage particularly painful for businesses was its sheer scale. Imagine every digital display, point-of-sale terminal, and back-office PC in your store suddenly going dark — simultaneously. For companies with small IT teams, manually recovering each individual machine became an exhausting, time-consuming ordeal. My sincere appreciation goes out to every IT professional who spent that Friday scrambling to restore operations.

    How My Stores Stayed Operational

    Fortunately, my own stores were not affected. I make it a personal policy to disable automatic Windows updates and instead perform manual updates on-site on a monthly schedule. This approach gives me full control over what gets installed and when — and moments like this are exactly why that policy exists. As of July 19th, 2024, all of my locations running Windows 10 and Windows 11 remained fully operational.

    I will admit that last month’s update did give me a brief scare, so I held off and waited for Microsoft to release a follow-up patch that resolved the issue. That fix arrived shortly after — and what a relief it was. There is nothing quite like the terrifying mental image of Blue Screens of Death spreading across every monitor in your store in the middle of the night while you are asleep. For many business owners this week, that nightmare became very real.

    Endpoint Central Dashboard During the Outage


    The Key Takeaway for Business Owners

    Think carefully before enabling automatic updates on business-critical machines. A controlled, manual update schedule requires more planning and effort, but it can protect you from a catastrophic, wide-scale outage at the worst possible moment. The July 19th CrowdStrike incident is a clear reminder that even trusted, enterprise-grade security software can become your biggest liability overnight.

    • Disable automatic updates on all point-of-sale and mission-critical Windows machines.
    • Test updates on one non-critical machine before rolling out store-wide.
    • Monitor patch notes from vendors like Microsoft and CrowdStrike before applying updates.
    • Keep a recovery plan ready — know how to boot into Safe Mode and access system directories quickly.
  • Migrate Google Drive to Nextcloud: Self-Hosted Guide

    I recently migrated all of my Google Drive data to my own self-hosted Nextcloud server—and I haven’t looked back. Now, I have complete control over my personal data. Everything is stored securely on my own hardware, rather than on third-party platforms like Google Drive, OneDrive, or iCloud. Many of these services charge ever-increasing monthly fees, even for basic file storage, and they can restrict or terminate your access at any time without warning.

    Why I Chose Nextcloud

    Nextcloud is a powerful, open-source cloud platform that puts privacy and control firmly in your hands. By self-hosting Nextcloud, I can store, organize, and manage all my files without depending on big tech companies. There are no surprise price hikes, no data mining, and no risk of losing access to my own files if an account gets flagged or suspended. For anyone serious about data privacy and digital independence, Nextcloud is one of the best Google Drive alternatives available today.

    All-in-One Productivity

    One of the biggest advantages of Nextcloud is its rich ecosystem of built-in apps. I installed an integrated office suite (powered by Collabora or OnlyOffice), which lets me create and edit documents, spreadsheets, and presentations directly inside Nextcloud—no third-party subscription required. I also use Nextcloud Talk for secure messaging, audio calls, and team collaboration. Having file storage, document editing, and communication all in one self-hosted platform has dramatically simplified my workflow and keeps everything organized in a single, secure location.

    How You Can Do It Too

    Ready to set up your own self-hosted cloud server? The best place to start is the official Nextcloud installation guide, which walks you through every step of the process.

    Personally, I use Cloudron to manage my setup. Cloudron makes deploying Nextcloud incredibly simple by offering it as a pre-packaged, one-click app. It handles updates, backups, and security automatically, making it an excellent choice for those who want a stable, low-maintenance self-hosted solution without deep Linux expertise.


    All of my data is now fully under my control. I’ve eliminated recurring payments to Google, and everything—from photos and documents to team communication—lives in one secure, private cloud that I own and operate.


    Apps I’m Running on My Nextcloud Instance

    • Files & Memories — Photo Management
    • Office Suite — Document & Spreadsheet Editing
    • Nextcloud Talk — Messaging & Video Calls
    • App Marketplace — Hundreds of Add-On Apps

    If you’re thinking about making the switch from Google Drive to a self-hosted Nextcloud server, feel free to reach out or explore the links above. The process is more approachable than you might expect—and the long-term benefits to your privacy and wallet are well worth it.

    Here’s a look at my setup in action:

    Nextcloud dashboard overview after migrating from Google Drive
    Google Drive files successfully migrated to self-hosted Nextcloud
    All my Google Drive files successfully migrated to my self-hosted Nextcloud server—no more paying Google for storage.
    Nextcloud app list showing installed apps on self-hosted server
    The full list of apps installed on my Nextcloud instance.
    Nextcloud Memories app displaying personal photo library
    My personal photo library managed through the Nextcloud Memories app.
    Nextcloud Talk interface for secure messaging and video calls
    Nextcloud Talk — secure, self-hosted messaging and video calling.
    Nextcloud App Marketplace showing available apps and integrations
    The Nextcloud App Marketplace — hundreds of apps to extend your self-hosted cloud.
  • Secure Network Cabinet Installation at Garyland Cottage

    As part of our ongoing improvements at the Garyland cottage, we recently completed an important network infrastructure upgrade — relocating all networking equipment from an open shelf to a secure, enclosed cabinet. This change was driven by two key goals: improving overall network security by keeping hardware contained and out of reach, and reducing the number of exposed power outlets to lower clutter and minimize potential hazards.

    Moving networking equipment into a dedicated cabinet is a best practice for home and small office environments alike. It keeps cables organized, reduces dust buildup on sensitive hardware, and makes it significantly harder for unauthorized users — or simply curious hands — to interfere with critical devices such as routers, switches, and wireless access points.

    Related: The Garyland Outdoor Wireless Bridge Project

    https://richardapplegate.io/so-exciting-were-going-to-garyland-wa-to-work-on-outdoor-wireless-bridge-for-internet-%f0%9f%99%8c-anthem

    If you missed the backstory, the post above covers the outdoor wireless bridge project at Garyland, WA — the foundation this cabinet upgrade builds upon. Together, these improvements represent a deliberate step toward a clean, reliable, and secure home network at the cottage.

    Before and After: Open Shelf vs. Enclosed Cabinet

    Network equipment sitting on an open shelf with exposed cabling and power outlets at the Garyland cottage before the cabinet upgrade
    Before: Network equipment sitting on an open shelf with exposed cabling and power outlets — functional, but unsecured and cluttered.
    Network equipment securely housed inside an enclosed cabinet after the upgrade at Garyland cottage, showing a clean and organized setup
    After: All networking hardware securely housed inside the enclosed cabinet — cleaner, safer, and far more organized.

    Why This Upgrade Matters

    • Improved security: Equipment is enclosed and no longer accessible to unauthorized users or accidental interference.
    • Reduced hazards: Fewer exposed power outlets means a safer environment overall.
    • Better cable management: Cables are contained within the cabinet, reducing visual clutter and tripping risks.
    • Hardware longevity: An enclosed space reduces dust accumulation on routers, switches, and access points.
    • Professional appearance: A tidy setup reflects well on the space and makes future maintenance easier.

    The results speak for themselves. The cabinet setup is far cleaner, keeps all networking hardware protected, and provides peace of mind knowing everything is secure and out of sight. Small, deliberate upgrades like this go a long way in maintaining a professional and reliable home network — especially in a remote cottage setting where consistent connectivity is critical.

  • Build Hardware Firewall: BOSGAME Mini PC + WireGuard

    BOSGAME E1 Mini PC used as a dedicated hardware firewall appliance

    Server security is something I take seriously. I recently upgraded my entire network protection setup by deploying a dedicated hardware firewall using a BOSGAME E1 Mini PC. This compact machine handles multi-server firewall duties with ease, and I also installed WireGuard VPN directly on the firewall to allow secure remote access from a single, whitelisted IP address — effectively eliminating the risk of SSH brute-force attacks and unauthorized intrusions.

    The firewall provides comprehensive protection against hacking, malware, ransomware, and phishing attempts. It also includes a built-in phishing blocker and spam blocker specifically configured for our email server — a significant advantage for business operations. The bandwidth control feature allows me to prioritize traffic and maintain consistent server performance, even during peak usage.

    Firewall dashboard displaying active network security features and traffic monitoring

    Speed Test Results: With and Without WireGuard VPN

    A common concern when routing traffic through a mini PC firewall is whether the hardware can sustain real-world internet speeds. Here are my side-by-side speed test results.

    With WireGuard VPN Enabled

    Internet speed test result with WireGuard VPN active on the BOSGAME firewall

    Without VPN

    Internet speed test result without VPN for baseline comparison

    I am very pleased with these results. The server location runs on a Comcast Business plan delivering 600 Mbps download and 200 Mbps upload. My home connection runs on Xfinity at 300 Mbps download and 35 Mbps upload. The BOSGAME Mini PC handles the VPN tunnel, firewall rules, and all additional security features without any measurable performance degradation. Upload speed is more than sufficient for remote access needs, and the web hosting environment is now significantly more secure.

    Firewall Hardware Specifications

    Below is a full breakdown of the BOSGAME E1 Mini PC I am using as a dedicated firewall appliance. Its small form factor makes it a perfect fit inside a locked network cabinet, keeping all critical hardware secure and organized.

    SpecificationDetails
    BrandBOSGAME
    SeriesMini PC
    Model NumberE1
    Operating SystemWindows 11 Pro
    Item Weight1.83 pounds
    Product Dimensions4.96 x 4.41 x 1.61 inches
    ColorBlack
    Processor BrandIntel
    Processor3.4 GHz Intel Celeron
    Number of Cores4
    RAM16 GB DDR4 SDRAM
    Storage512 GB SSD (PCIe x2)
    GraphicsIntel UHD Graphics (Integrated, 16 GB shared)
    Max Display Resolution3840 x 2160 (4K UHD)
    USB 3.0 Ports4
    View the BOSGAME E1 Mini PC on Amazon

    I also switched from a full-size desktop PC to this compact mini PC specifically because it fits neatly inside a network cabinet, keeping everything tidy, secure, and out of the way.

    BOSGAME E1 Mini PC installed and mounted inside a locked network security cabinet

    Final Thoughts

    Overall, this hardware firewall setup using the BOSGAME E1 Mini PC has been a game changer for our server security. If you are looking for an affordable, low-power, and capable mini PC firewall solution that supports WireGuard VPN, phishing and spam blocking, bandwidth management, and multi-server protection, this is a solid option worth serious consideration.

  • Set Up DNS-over-HTTPS on TP-Link Omada with AdGuard

    I finally got DNS-over-HTTPS (DoH) working with Cloudron AdGuard Home. The key issue is that AdGuard Home will not accept connections on the encrypted DNS port until you add an IP address or Client ID to the Allowed Clients list. In this guide I use a Client ID. Follow the steps below to configure DoH on your TP-Link Omada controller with AdGuard Home as your upstream DNS resolver.

    What Are Client IDs?

    AdGuard Home supports Client IDs as a way to identify devices or services that are allowed to use its encrypted DNS endpoints. DNS-over-HTTPS is especially useful on internal networks when you already hold a wildcard TLS certificate, because every client can reach the resolver over a secure, authenticated channel.

    Step 1 — Add a Client ID in AdGuard Home

    Open AdGuard Home and sign in to your admin account. Navigate to Settings → DNS Settings and locate the Allowed Clients field. Enter the Client ID you want to use for your Omada controller — in this example the ID is laketapp (a nickname for the store). Click Save when finished.

    AdGuard Home DNS Settings page showing the Allowed Clients field with the Client ID 'laketapp' entered
    AdGuard Home Allowed Clients list saved with the 'laketapp' Client ID

    Step 2 — Log In to the TP-Link Omada Controller

    Open the TP-Link Omada Controller web GUI and log in with your admin credentials. Select the site (location) where you want to enable DNS-over-HTTPS.

    Step 3 — Navigate to Services → DNS Proxy

    In the left-hand navigation panel, click Services, then select DNS Proxy. Enable the DNS Proxy toggle, choose DoH (DNS-over-HTTPS) as the protocol, and enter your AdGuard Home DoH server URL. In this example the URL is:

    https://laketapp.dns195.richardapplegate.io

    The Client ID (laketapp) is embedded in the subdomain, which is how AdGuard Home identifies and authorises the request.

    TP-Link Omada DNS Proxy settings page with DoH enabled and the AdGuard Home DoH URL configured

    Step 4 — Verify Queries Are Reaching AdGuard Home

    Return to the AdGuard Home dashboard and open the Query Log. You should immediately see queries appearing from your Omada router, confirming that all DNS traffic is now flowing through AdGuard Home over an encrypted DoH connection.

    AdGuard Home Query Log showing DNS queries arriving from the Omada router

    Your TP-Link Omada router is now communicating with your self-hosted AdGuard Home DNS server over an encrypted, authenticated DoH connection.

  • Arista Firewall Setup: DDoS Protection for Sunrise Village

    I built another mini computer for Sunrise Village and added another network card to my mini computer for internal and external network. Not only that, but I also set Internal to “bridge” and set my Modem wire to firewall “external” and then firewall “internal” to a 1 gigabit switch. So I can put more Server in one 1gig switch. We had static IP, and we’re using these on our server, so My Firewall will not protect my server until I create rules and firewall and Threat Prevention and virus Blocker.

    We can upgrade to 2.5Gig or 10gig speed on our server and firewall, but our plans are 600mbps and 200mbps uploads, so it is enough for all my server to hosting on switch.

    Not only that, but we have Three locations that require a firewall. I set up a firewall at Sunrise Village a few days ago, and it is working well. We need to protect where our server is that runs all of our store network and slack alternative and cloud storage.

    User 1: Omada TpLink Router Hosting
    User 2: Web and Email Hosting
    User 3: all apps in one server solution.

    A firewall serves as a safeguard against distributed denial-of-service attacks on the Internet.
    The firewall on our modem is weak, and we’re still getting DDoS attacks. We need a better firewall, so we can’t worry about our server and network systems.

  • Secure SSH with Fail2Ban on Ubuntu: Stop Brute-Force


    Fail2Ban is a free Python tool that helps protect Linux servers from brute-force attacks. It’s especially useful for securing SSH. With Fail2Ban, you can automatically block IPs that try to guess passwords on your server.

    Why Use Fail2Ban for SSH Protection?

    Brute-force attacks can cause thousands of failed login attempts every day. If your server uses password-based logins, you need a way to block attackers. Fail2Ban watches your log files and blocks any IP that tries—and fails—too many times.


    Step 1: Update Your Ubuntu Server

    First, make sure your system is up to date:

    sudo apt update && sudo apt upgrade
    

    Step 2: Install Fail2Ban

    Install Fail2Ban using apt:

    sudo apt-get install fail2ban
    

    Enable Fail2Ban to start automatically:

    sudo systemctl enable fail2ban.service
    

    Step 3: Configure SSH Protection

    Do not edit the default config file!
    Instead, create a new file for your custom settings:

    sudo nano /etc/fail2ban/jail.local
    

    Add these lines to protect your SSH server:

    [sshd]
    enabled = true
    port = ssh
    filter = sshd
    logpath = /var/log/auth.log
    maxretry = 3
    findtime = 300
    bantime = 3600
    ignoreip = 127.0.0.1
    

    What these settings mean:

    • enabled: Turns on protection for SSH
    • maxretry: Blocks an IP after 3 failed logins
    • findtime: Looks for failed attempts in a 5-minute window (300 seconds)
    • bantime: Blocks the IP for 1 hour (3600 seconds)
    • ignoreip: Never blocks your own server

    Step 4: Restart Fail2Ban

    Apply your new settings by restarting Fail2Ban:

    sudo systemctl restart fail2ban.service
    

    Now, Fail2Ban will automatically block any IP that fails to log in 3 times in a row.


    How to Unban an IP Address

    If you need to remove a ban, follow this guide on unbanning with Fail2Ban.


    With Fail2Ban, your Ubuntu server has stronger SSH brute-force protection. This makes your server safer and gives you peace of mind.

Secret Link