Category: Linux Server

  • Today, I Survived a Triple DNS DDoS—And Learned the Power of Port 853

    What a wild ride! As someone who cares deeply about keeping ads and trackers away, I run not one, not two, but three Adguard Home DNS servers for my network and my work and a few trusted friends. Things were smooth…until today’s wake-up call.

    When 3 DNS Servers All Go Down

    Early this morning, my phone lit up with monitoring alerts: All three Adguard Home DNS servers were timing out. At first, I figured it was typical network flakiness, but when I logged in and checked the stats—yikes! Each DNS server was being bombarded with requests. Log entries were flying by like a slot machine, and CPU loads were through the roof.

    I quickly realized: this was a full-blown DDoS attack. Someone (or something) had decided today was the day to flood all my DNS instances and bring them to their knees.

    Port 53 is Love, Port 53 is Pain

    If you run a DNS server, you know traffic flows through port 53. It’s the default, it’s widely known, and unfortunately, it makes you a target. Even with basic security and firewall rules, a determined attacker can throw a gigantic amount of junk queries your way. The more public your DNS, the more likely it is to end up on a botnet’s hit list.

    I tried to mitigate: blocking IPs, tweaking Adguard’s query limits, but the traffic just kept coming—botnets can scale, after all.

    The Fix: Hello, DNS-over-TLS (853)!

    Desperate for relief, I remembered what sets modern DNS apart: encryption. Both DNS-over-HTTPS (DoH) and DNS-over-TLS (DoT) remove reliance on the open port 53, using encrypted connections to a different port.

    • DoT uses port 853.

    So, I did something radical (for my setup):

    • I closed public access to port 53 on all three servers.
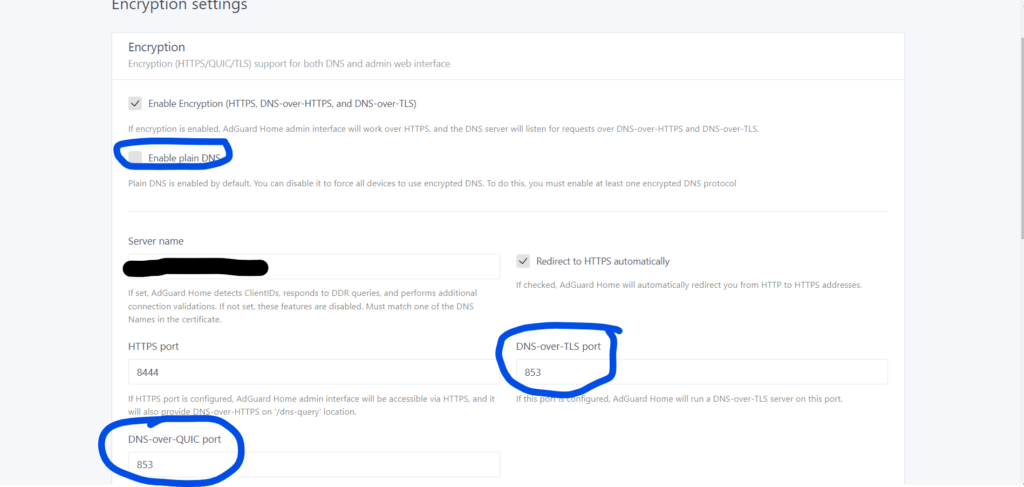
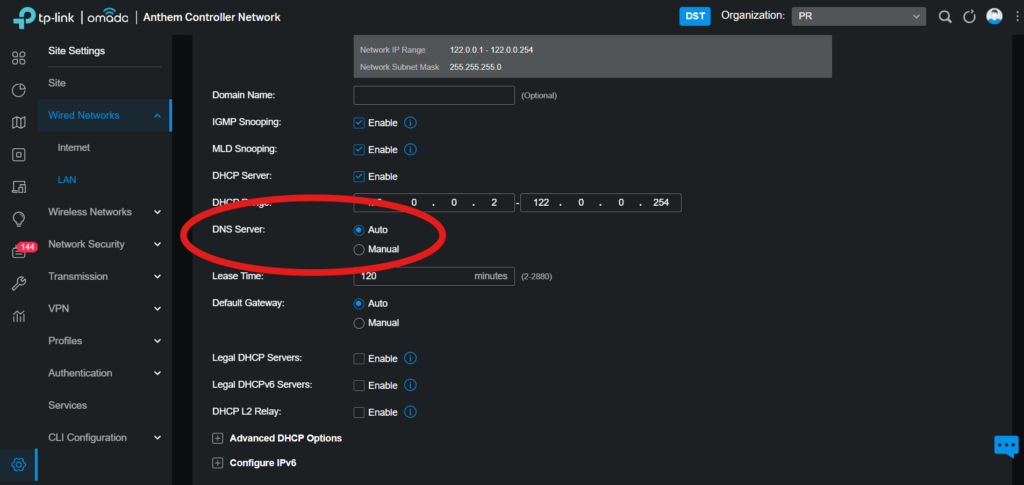
    • I configured Adguard Home to only accept DNS-over-TLS traffic on port 853.
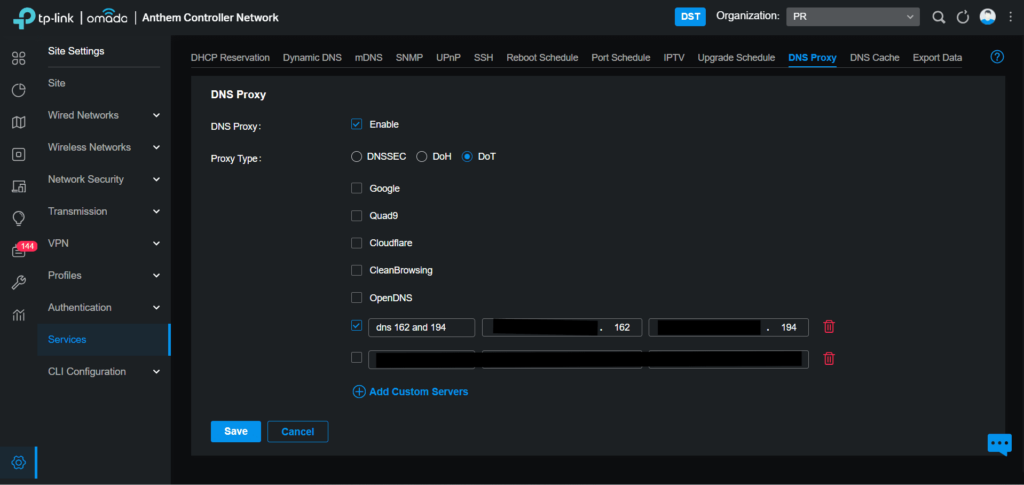
    • I made sure my clients (phones, computers, routers) were using DoT (port 853) instead of plain DNS.

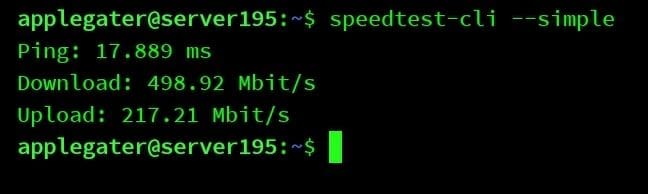
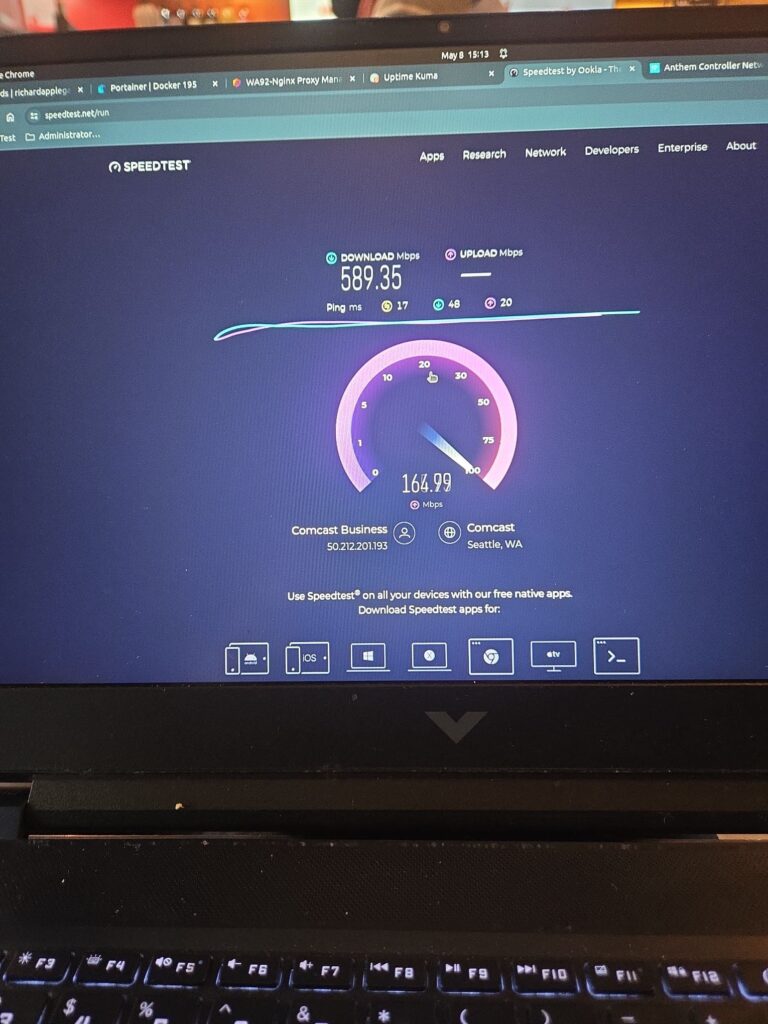
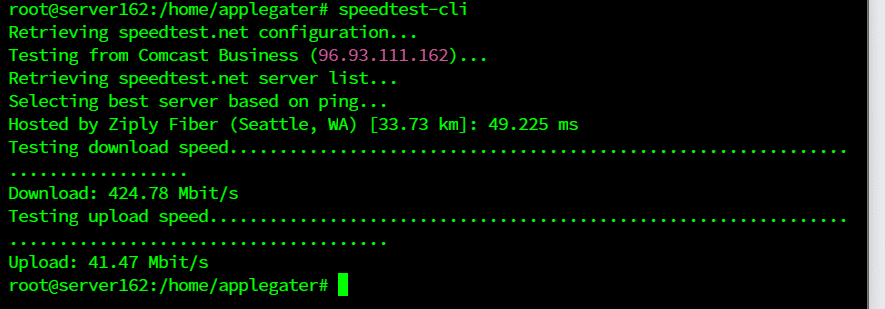
    Like flipping a switch, the attack ended. No more flood, no more timeouts—just blissfully fast, secure DNS again.

    Why This Works

    Open port 53 is universally scanned—by researchers and attackers—for DNS servers to abuse. By limiting access and switching to encrypted DNS-over-TLS, you:

    • Hide your DNS from general internet scanning.
    • Require authentication (sort of; at least a valid TLS handshake).
    • Dramatically reduce DDoS exposure, since randomized bot attacks target port 53 by default.

    Lessons Learned

    • Don’t run a public port 53 DNS unless you must. Always lock it down or require VPN/TLS/DNSCrypt.
    • Encourage clients to use DoT or DoH—they get privacy AND you get peace of mind.
    • Know your tools: Adguard Home makes it surprisingly easy to deploy DNS-over-TLS.
    • If you rely on DNS, have a mitigation plan—DDoS can strike anyone, anytime.

    Next steps? I’ll keep a close eye on logs, make sure clients are all set up with DoT, and might even look into DNS-over-HTTPS as a backup.

    How about you? Have you had to defend your home DNS from attacks? Share your story below!


    Stay safe, and happy (private) browsing!

    The initial offensive commences on May 25, 2024. Additionally, the internet will experience a gradual slowdown to 2 Mbps and 3 Mbps during uploads; this is how people tell us they did the DDoS attacks on us.
    This is after and much better

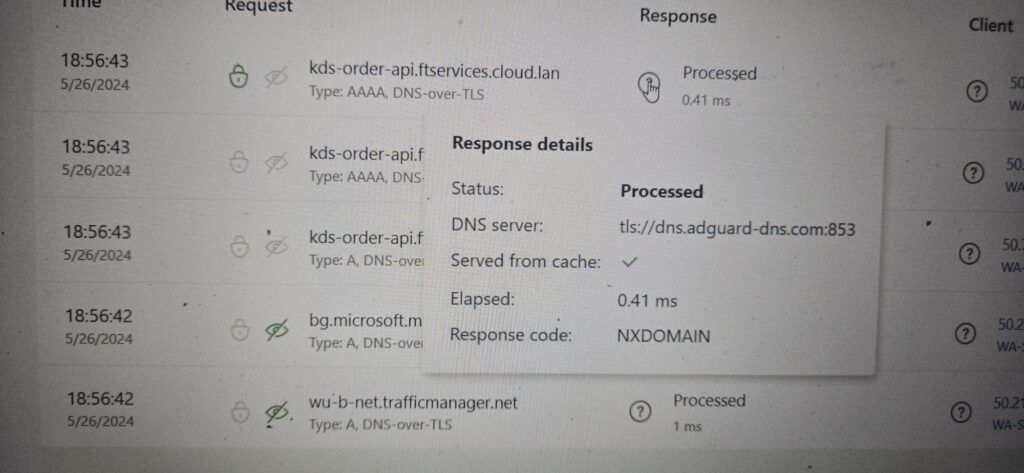
    My DNS query results confirm that all our DNS servers are secured with DNS over TLS encryption.

  • DNS amplification attack | closing the 53 port on my AdGuard Home Server.

    Today, I turned off the DNS port 53. Since we have been cutting off our store’s DNS server, it has been a DNS amplification attack. So I found out that my Router does have a DNS Proxy, My DNS Server does have HTTP over TLS and DNS-over-HTTPS. Everything is working and attacking is currently stopped after I set up 853 port encryptions and disable Plain DNS. I also want to keep my stores safe.

    Disable Plain DNS and DNS over TLS is 853.

    My router has a DNS Proxy option, so I added my DNS IP Server,

    Then I have gone to Wired Networks → LAN, then go to Admin

    If you change DNS Server to your DNS, please change to Auto So DNS Proxy to do the job.

    Now we have an encrypted DNS over TLS.

  • Comcast business upgrade speed automatic no cost!

    Indeed, it was the correct decision. Comcast Business has recently upgraded our plans to 250 MBPS, automatically upgrading with download speeds reaching 500 MBPS and upload speeds at 200 MBPS. I have decided to relocate my server from medical to another location that offers the highest upload speeds and is ideal for smooth operation.

    500mbps download and 200 uploads from comcast Business.
    This is my first experience in our business.

    Subsequently, I have established a website at https://status.richardapplegate.io for my work status uptime. It is crucial to me to monitor their performance constantly. I also monitor our comcast business gateway. Great to document their outrage from time to time to provide us credit.

  • How to Deploy MariaDB with Portainer Stacks Using Docker Compose


    If you’re looking to run a robust relational database in your Dockerized environment, MariaDB is an excellent open-source choice. With Portainer, managing your databases and application stacks becomes super easy—even with little Docker experience. In this post, I’ll walk you step by step through deploying MariaDB using Portainer Stacks (which leverages Docker Compose).


    Why Use MariaDB with Portainer?

    • MariaDB: Powerful open-source database, compatible with MySQL.
    • Portainer: Friendly web UI to easily deploy, manage, and monitor Docker containers, stacks, and services.

    Using them together lets you:

    • Quickly spin up databases.
    • Take advantage of persistent storage.
    • Easily manage your containers and stacks through a visual interface.

    Step 1: Access Your Portainer Dashboard

    You need your Portainer instance up and running. Log in at
    http://<your-server>:9000
    Replace <your-server> with your server’s IP or domain.


    Step 2: Open Portainer Stacks

    • On the left sidebar, click Stacks.
    • Then, click the “+ Add stack” button.

    Step 3: Compose the MariaDB Stack

    1. Name your stack (e.g., mariadb-stack).
    2. In the Web editor area, paste the following Docker Compose YAML (and adjust credentials as needed):
       version: '3.8'
    
       services:
         mariadb:
           image: mariadb:11.3
           container_name: mariadb
           restart: unless-stopped
           environment:
             - MARIADB_ROOT_PASSWORD=YourRootPassword123
             - MARIADB_DATABASE=mydatabase
             - MARIADB_USER=myuser
             - MARIADB_PASSWORD=userpassword
           ports:
             - "3306:3306"
           volumes:
             - mariadb_data:/var/lib/mysql
    
       volumes:
         mariadb_data:

    What does this do?

    • Pulls the latest MariaDB image (v11.3).
    • Sets up root/user passwords and a database.
    • Persists your data in a Docker volume (mariadb_data).
    • Exposes MariaDB on the default port 3306.

    Step 4: Deploy Your MariaDB Stack

    Scroll to the bottom and click Deploy the stack.

    Portainer will pull the required images and create your MariaDB container.


    Step 5: Connect & Use Your Database

    The MariaDB instance is now running! You can connect to it:

    • From any app on the server:
      localhost:3306, user myuser, password userpassword
    • From another machine (if port 3306 is accessible):
      your-server-ip:3306, same credentials

    Use your favorite MariaDB/MySQL client, or connect from other containers via the Docker network.


    Optional: Add phpMyAdmin for Easy Database Management

    Want a web interface for MariaDB? Just add phpMyAdmin to the stack by updating your YAML:

    version: '3.8'
    
    services:
      mariadb:
        image: mariadb:11.3
        container_name: mariadb
        restart: unless-stopped
        environment:
          - MARIADB_ROOT_PASSWORD=YourRootPassword123
          - MARIADB_DATABASE=mydatabase
          - MARIADB_USER=myuser
          - MARIADB_PASSWORD=userpassword
        ports:
          - "3306:3306"
        volumes:
          - mariadb_data:/var/lib/mysql
    
      phpmyadmin:
        image: phpmyadmin:latest
        restart: unless-stopped
        ports:
          - "8080:80"
        environment:
          - PMA_HOST=mariadb
          - PMA_USER=myuser
          - PMA_PASSWORD=userpassword
    
    volumes:
      mariadb_data:

    Now, after redeploying the stack, visit:
    http://<your-server>:8080 for a full-featured GUI!


    Tips & Best Practices

    • Secure Your Database: Don’t expose port 3306 to the internet unless necessary.
    • Persistent Storage: Docker volumes make it easy to back up or move data.
    • Stack Upgrades: Edit the stack YAML and re-deploy for future changes.

    Conclusion

    With just a few clicks and a simple YAML file, you can have a resilient MariaDB server up and running using Portainer Stacks and Docker Compose. Add phpMyAdmin for web-based administration, and you have a powerful, easy-to-manage development or production setup!

    Have questions or run into trouble? Drop a comment below! 🚀


Secret Link